Sunday, 28 July 2019

Plantation of veggies and nursery for the month of July/August 2019


Want to know what can be grown for the months of July- September 2019?

Do you belong to Andhra/Telangana and Chennai regions? Then this is for you.

Related image
Open Pollinated seeds!
Greens: Spinach, sorrel, fenugreek, mustard, coriander, Spinach (creeper variety), amaranth, radish, beetroot, and Malabar spinach.

Vegetables: Brinjal, tomato, chilies, ladies finger, cluster beans, Cabbage, cauliflower, Bush beans, and Black-eyed peas.

Root Crops: Radish, beetroot, carrot, colocasia, tapioca turmeric, sweet potato, onion, and garlic.

Herbs: Indian Borage and Basil

Trellis and creepers: Beans, Ash gourd, Pumpkin, ridge gourd, snake gourd, bottle gourd, cucumber, and Ivy gourd.

Flowers: Chrysanthemum, marigold, sunflower, and mustard flower.

(If you feel like something is missing, please mention them in the comments box.will update them). 

Thursday, 11 July 2019

Home Composting Kitchen scraps (cooked+uncooked waste)

Home Composting (Aerobic)

Related image


Materials required:  

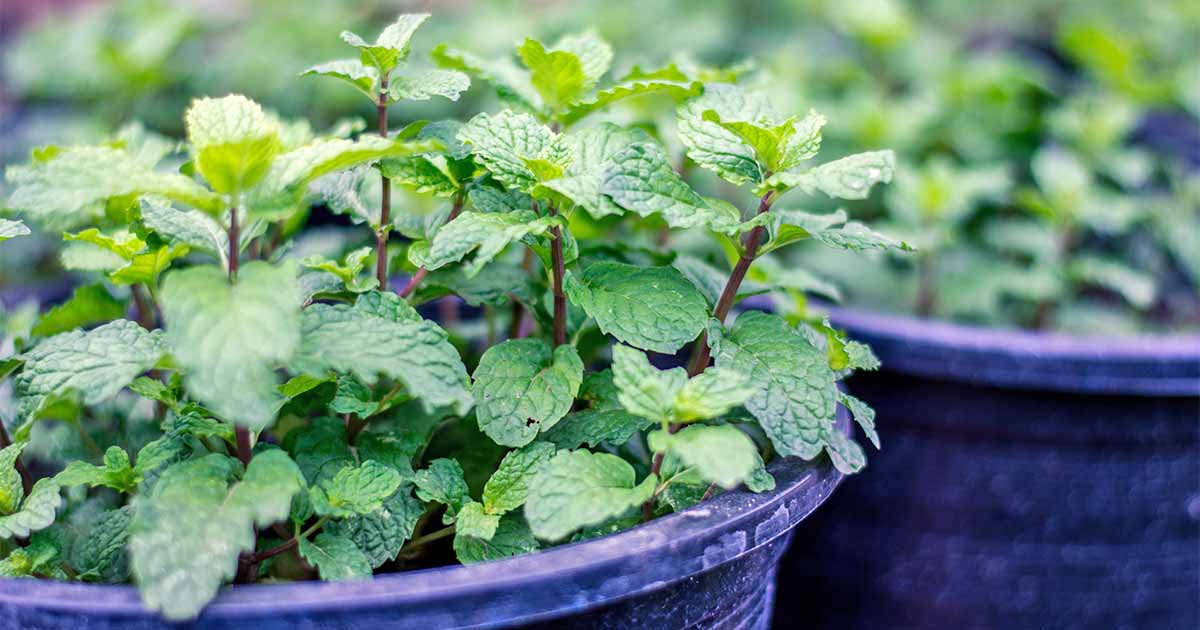
·      A perforated container.

·    Brown matter(carbon): Dried leaves, unbleached, uncoloured, unlaminated cardboard pieces, saw dust, cocopeat, dry soil, sand, peanut shells, rice husk etc.

·  Green matter(nitrogen): Fresh veggie peels and fruit peels, strong acidic peels like citrus, lemon, chillies, onions, garlic and ginger, meat, bones, dairy products and rotten food.

·      Whatever the peel other than the above, chop it finely and thoroughly before adding it to the compost. Eggshells are to be crushed before adding them to the compost. Coffee grounds, tea powder works well with composting. You may also add hair and nails. 

·      Never add heavily coated paper. You may add unbleached white papers but not printed papers as it may contain lead.

·       If you are not able to get brown matter, you may get some soft coconut fiber, tear them to tiny chunks and put them in a mixer grinder to make it a fine powder. This can be added to the compost.

·       Maintain moisture of the compost by sprinkling some water, do not keep it dry and do check it regularly...every day. keep the container in a shady place.


·     Optional Materials Required:

o    Ash (Adding ash to compost enrich the quality of the compost, maintains alkalinity. Bakeries are good sources of ash.

o    Charcoal: Acts like sponge absorbing extra moisture also has the ability to store nutrients and release them slowly when added to the soil. Iron wallas are good source of charcoals.

o    Sour buttermilk: Improves and increases the microbial activity. You may sprinkle butter milk to increase the rate of composting. 


·         Procedure:

o    Put a layer of carbon/brown matter (oddly shaped twigs,coconut fibre,etc. To form the bottom most layer of the container). These should be two parts (say 2 cups as unit of measurement)

o     Add one part of wet kitchen waste (say one cup as unit of measurement that is drained of all excess water) to two parts of brown matter. Mix well and make sure that the resulting mater is moist and not soggy. You may also add charcoal, ash, cashew-nut powder (from 4 pieces), table spoon of cinnamon powder in the initial stages to enrich the compost.

o    Add this to the container and cover with thin layer of browns and leave it alone. This layer prevents files from sitting on the pile.

(Now! the important thing to do is as below:

Preparation of Lactic Acid Bacteria (LAB):
  1. Collect 100 ml. of reject water that comes from washing the raw rice.
  2. Take the above liquid and mix them with 300 ml. of milk in a small mud pot and cover it with a muslin cloth and tie it properly. Leave it for 4 days.
  3. After 4 days, open it and remove the scum over the surface area, then separate the curd part of it(and discard them), then the remaining liquid is called Lactic Acid Bacteria. Collect this liquid separately.
Preparation of fermented rice:

  1. Keep the cooked rice as it is undisturbed for 4 days. It gets fermented.
  2. There will be a layer over the surface of the fermented rice. It is an indication.
Now, Add LAB to the fermented rice. it will turn into a solution. Now! to this solution add one table spoon of rice bran in the solution. Leave the solution as it is for 4 days.

Now! the bacteria culture is ready.

Now add 10 ml of the above solution to the compost pile once in a two days and turn it whenever you find time...)

o    Repeat the first steps 2 and 3 every day.

o    Stir the pile as often as you can to allow a lot of air.

o    When the first container gets full (3/4th level), prepare another container and follow the same procedure.

o    Keep stirring the compost pile in the first container throughout the process. The pile will become hot in its initial phase.

o    By the time the second container becomes full, it is possible that the first pile cools down and the contents look dark and half composted. Partly composted matter is not messy to handle and can be transferred into a plastic or a jute sack for further composting making the container available for a fresh batch. Or, if you have more containers to spare, keep using newer ones to start the process and retain the compost in the bin until all of it is completely done. 

o    Sieve the contents and add the big pieces that need to break down further to a next batch of waste for composting.
Complete Look

·  Enriching the compost: The homemade compost can be enriched by adding red-wrigglers and other earthworms to the compost that is already done in a separate container. 

Some tips:

1. Adding the ratio 2 parts of browns to 1 part of greens should be done without any compromise. We don't have any choice here.
2. While adding the waste, if possible shred them to the maximum you can. This will speed up the composting procedure.
3. Adding the bacteria culture is very important otherwise we cannot be able to compost the cooked waste. if you do not add them, it will make the compost stinky with a bad smell. It might also attract some worms. You don't have any choice here. Make the bacteria culture or you go for uncooked kitchen waste composting.
4. Always maintain dampness in the compost bin. Don't keep it too dry or too soggy. strike a balance.

I hope this helps! 

If you have any questions, mention them in the comments box below and subscribe this blog for more updates like this.

Wednesday, 10 July 2019

TransFarmer Community (For gardening inputs and other Items for sale/exchange/gift/share)

Growing Coriander


Image result for growing coriander

Growing Coriander

  • Collect good quality dhaniya seeds preferably an open pollinated seeds.

  • Crush and rub them with a slipper until the seeds split into two

  • Check for the potting or soil mix. It should be well drained soil. If it's not, add some coco-peat or some sand.

  • Moist the soil surface, before you sprinkle the seeds.

  • Now, just sprinkle the seeds evenly over the surface of the soil. 

  • Just sprinkle some soil mix around to cover the seeds.

  • Cover it with a tissue paper over the surface the area of the soil and sprinkle some water over the tissue paper.

  • Put a layer of mulch with dry leaves and sprinkle water over the leaves.

  • Wait for 4-5 days for proper sprouting. Check for sprouting in the mean while. keep the tissue paper moist. Don't let it dry during the seed to sprouting stage.
Image result for growing coriander
  • Once sprouted, it will take her own care. It needs sunlight.

Sunday, 7 July 2019

Growing Mint


Related image

Growing Mint:

👉Cutting of the sprig should be done carefully. In between two stem-branch junctions. 

👉Make a slant cutting, the sprig to be planted as earlier as possible. This is applicable if you get a cutting from a runner. If it is not a runner, then the sprig should be placed in a transparent glass of water. Apply little bit of saliva, cinnamon powder and aloevera gel to the tip of the cutting before you place them in the water glass. Also add few drops of honey into the water glass for proper root growth. It should be kept as it is until the root emerges. It will take 4-5 days for proper rooting. No need to change the water in the glass each day. If you can see the roots emerging then its time to transplant.

👉The planting medium should be taken into consideration. If it's a potting it is very easy to propagate otherwise, the soil should be a  well drained soil.

👉Initially, leaves will wither and after that fresh leaves emerge.
Image result for mint

👉Apply moringa leaf spray once in a week...and home made compost once in a week...greens take up more nutrition from the soil or potting mix. 

Slowly things will fall into place...

👉It will grow in shade also. Rate of growth is high with sunlight.

I hope this helps...

Friday, 5 July 2019

Natural Cleaning Solution

Natural Cleaning Solution aka Bio Enzyme
This all purpose cleaning solution is used for floor cleaning, washing veggies, plants, pest control, personal care and dirt remover.

Preparation: 
  • Remember the ratio 1:3:10 – Jaggery to Citrus Peels to Water. That is take one part of Jaggery, 3 parts of Citrus peels and 10 parts of Water. If you use one cup of Jaggery, use the same cup to measure the other two ingredients as well. But you need not be 100% accurate to the last dot – the cleaning solution is forgiving if you add a bit more of this or that (not too much or too less though!). Take a big enough and air tight container with a lid which can accommodate this solution + still have a 10 – 15 % space left empty. Mix these three ingredients in that container, put the lid on, label it with the date of creation and leave it in a dark place (such as inside your kitchen cupboard or under the sink). 
  • Once the solution starts fermenting (will be explained in a bit), it will start releasing some gases that will get built up in the empty space in the container. Before this gas becomes too much and “pops” outside, you will need to release them. Hence, you will need to open the lid once in a day (for first one week at least), air it out for a minute or so (no need to stir or do anything else!), put the lid back on, keep it back in the dark place and again forget it for another day. From second week onwards, the gas activity will reduce a bit and you need not open every day - you can open every other day.
  • It is not advisable to use metal and glass as it will not be able to expand. There are gases that will get released during the process of production – so plastic is a better option. You can use any old plastic container lying around.
  • There are two ways you can make this process faster. 
      • You can add yeast (the regular Baker’s yeast( 3-4 globules are enough) you will get in Departmental stores). This will make the cleaning solution ready in just 20 days. 
      •  You can add the leftover pulp of a previous batch. This will make the cleaning solution ready in 30 days.
Otherwise, it will take some three months time to prepare with citrus peels, jaggery and water alone.
  • As for how to know when it is ready: Three factors. 
      • 1. Time  - As mentioned, it takes 3 months to make the Cleaning solution without any yeast. If one adds yeast, it can get done in 20-25 days (provided right environment is maintained for the microbes to flourish). This has been calculated based on lot of people's experience and research.
      • 2. Stopping of Gas production - As the fermentation slows down, so will the production of gases from the solution. At the end of the time period, most of the food materials, if not all, would have been converted by the microbes into Vinegar or Alcohol and there won't be anything left for them to munch. So they will start to de-activate or die. This signals that solution is ready. However, one needs to use this indicator along with the time as sometimes fermentation might slow down in between also due to unfavorable conditions (we will see more details of this below).
      • 3. Peels settling down - the Peels we used to make the solution - as they get processed by the microbes (in essence, eaten up) - will start to settle down to the bottom of the container. This is a good indicator - sometimes, some peels will continue to float while most settle down. That is okay.
Filter the solution to separate the diluted part and pulpy part separately. For harder stains, the pulpy part can be used.
some of the "unfavorable" things that can happen that can slow down or affect the cleaning solution production process:
1. Leaving your container open and letting in too much oxygen - As mentioned, fermentation releases carbon dioxide along with minor quantities of other gases. This CO2 needs to be let out while letting in bit of Oxygen. However, if we completely leave the container open, too much aerobic condition will affect the final quality of the solution produced.
2. Worms and Flies in your cleaning solution container - this will also occur only if you had NOT been careful about your container and left it open at some point inviting flies to come in and breed. This can slow down fermentation to a great extent and take away the food meant for microbes. We can try to correct when worms occur (we need to add extra jaggery and by closing container in air tight manner for 1 week - hopefully, the worms will die. Otherwise, one just needs to abandon and start again.
3. Temperature - Microbes like a temperature that is close to our body temperature. So if we are able to maintain that in the solution, then the fermentation will happen pretty fast. But if we create extreme temperature fluctuations or worse make it too hot or too cold, fermentation will get affected. For example, keeping the solution inside your fridge - thats a big NO. Keeping your sunlight in direct sunlight - that's a big NO. Shifting your container continuously from place to place causing lot of temperature fluctuations - that's a BIG No. Tip: Try to keep the Enzyme under the sink in your kitchen (relatively warm place in your house) or even on top of your fridge (where heat is generated) protected by a cloth underneath. 
4. Forgetting to open for months and months - Now, just the way leaving your container totally open is also a problem, not opening at all can also be a disaster. The built up gas, for one, can cause an explosion! Two - the accumulated CO2 will end up killing the microbes as well. Hence, the suggestion to open it once a day initially (when fermentation rate if at its highest). After that, when fermentation slows down and gas production slows down, you can open it once in two or three days.
Uses of Natural cleaning solution:
1. As a surface cleaner: Floor Cleaner, Tile Cleaner, Toilet Cleaner, Stove/Chimney Cleaner (concentrated version or the pulpy residue), Window Cleaner, Car wash, etc.
2. As a dirt remover: Laundry liquid , Vessel Cleaner, stain remover, etc.
3. As a personal care product (to be used after individual testing ONLY): Body wash, Shampoo, Hair conditioner, Shoe odor remover
4. As an antibacterial and antiviral: Refrigerator cleaner, Cabinet cleaner, Unclogging drains
5. Washing Vegetables and Fruits to neutralize harmful fertilizers/pesticide residues on them
6. Pest Control: Continued use of Cleaning Solution have been known to repel small insects, ants, cockroaches at home (though it doesn't kill them). Also, Cleaning Solution is being used extremely effectively in fumigation along with Soapnuts and Neem Oil. 

7. Plant Care: It is a wonderful bloom nutrient. Also helps in managing plant pests like whiteflies, mealybugs and spider mites.

8. Treating Reject water: Reject water coming from RO plants, ACs and kitchen grey water can be treated with the natural cleaning solution. Adding 10ml to a bucket of above reject water makes a great difference. It has a power to clean rivers.

9. Adding a litre of natural cleanser solution in a overhead tank may reduce scaling issues with taps and pipes.


There may be many more uses that may just need to be discovered!

Wednesday, 3 July 2019

"Grow Your Food from the scratch" (Saturday, August 10, 2019, near Kamaraj Nagar, Tiruvanmiyur, Chennai)


Have challenges in meeting your Gardening Goals? Looking for a Coach to guide you in the process?

Looking for practical ideas to recycle and integrate your kitchen solid and liquid waste with your garden to tackle the water scarcity?

Want to know, how to re-use the reject water from AC and RO plant?

Thinking of starting a kitchen/flower/herb/ornamental garden on your terrace/balcony/backyard?
Related image


Don't know how to start and keep it flowing?

Confused with watching YouTube videos on Gardening?

Don't know what to plant according to Chennai climate?

Want to know the plant care to be taken in different seasons?

Have challenges with pests and rodents? 

Willing to know the easiest way of making DIY natural growth boosters and pest repellents?

Worrying about the upfront costs involved in gardening and want to know the simple and economical way of gardening?

want to explore the different and multiple uses of plants in our everyday life?

will you be able to spend 01-02 hours on gardening every day?

Then here you are!

Here is a kick-starter opportunity to learn some practical knowledge required to start a garden from scratch.

Some More info about the workshop: 

1. To make you realize what is needed to start a garden you envisioned, considering your daily routine pattern.

2. To support you and to hold you in the process of dealing with your mistakes.
Image result for dream garden


Details Of The Event:  "Grow Your Food from the scratch"                                                                  Saturday, August 10, 2019
      
                        Time:   09:00AM until 01:00PM
                   
                      Venue:    L123, 10th West Street,
                                    Kamaraj Nagar, 
                                    Tiruvanmiyur,
                                    Chennai.
                                    Landmark: Aavin Junction.

                       GPS:      Preethi's Residence (Google Map)


For venue related queries, contact preethi: +91-9500080920


Contributions: This workshop is being offered in the spirit of Gift-Ecology. It means, "Contributing from the heart". We do not have a fixed charge for the workshop. However, we expect your contributions. They will actually help us to cover upfront costs, sustain ourselves and help us in continuing our work. Having said this, 

If you are unable to contribute for reasons best known to you, It's okay. There will be no restrictions. We will figure out a way for you...

Contributions can also be like monetary funds, offering space/venue, offering skill/product/services that will help me to continue my work.

Bring along:  Please try to bring the following while attending for the workshop:

1. Notes and pen

2. Shredded vegetable, fruit peels,
 few fruit pieces of any two different fruits,
 lemon peels, dried leaves, flowers, and eggshells(one small bag)

3. Jaggery powder (as much as you can, say 100g)

4. Plastic bottles, glass jars (one or two)

5. seeds and saplings (To exchange/share/gift with other participants)

6. coconut outer fiber and

7. snacks to share during the break (only if you are okay from the heart)

(you can learn things in practice, So, please try to bring the above).

Please write a note to me through WhatsApp or SMS on challenges you have with gardening and your expectations from the workshop. This will help me to design the workshop according to your needs to make it more participant centric.

If in case, you have confirmed your participation and not able to attend for some reason, please inform at least one day in advance. It will help people who are in a waiting list to attend the workshop.

Please make sure, you reach the venue as early as possible, before 09:00AM

I request you to refrain from having cross conversations and attending phone calls during the workshop, it disturbs everyone

Workshop Agenda will be sent to your registered mobile number through WhatsApp or SMS by Friday night, Once we are done with finalizing participants.
                            
Important to note: We cannot fill a cup which is already full. So, please be open to how the process flows. 

About the facilitator: www.tinyurl.com/guruboppana

To Register, Fill up the form below:

 
Please call or message us, once you are done with the registration!

Best wishes...
Guru Sunny Boppana
(Gardening Coach)

Pit Composting (cooked +uncooked waste)

Pit Composting

Image result for pit composting

Follow the below steps carefully:

  1. Dig a pit of flexible size depending upon your size. (if you need a second opinion, mention that in the comments section).
  2. Dump all the bio degradable waste like dry leaves, wet waste like kitchen scraps, fruit and vegetable peels, meat, milk, dairy products, spoiled food etc., only biodegradable waste. (no plastics please). The ratio is 2 parts of dry waste to 1 part of wet waste.
  3. If you shred the waste, it will improve the rate of composting process.
  4. Make sure there is enough moisture in the pile. Water the pile frequently if it gets dry.
  5. Turn the pile, whenever you find time.
Now! the important thing to do is as below:

Preparation of Lactic Acid Bacteria (LAB):

  1. Collect 1 liter. of reject water that comes from washing the raw rice.
  2. Take the above liquid and mix them with 3 liter. of milk in a mud pot and cover it with a muslin cloth and tie it properly. Leave it for 4 days.
  3. After 4 days, open it and remove the scum over the surface area, then separate the curd part of it(and discard them), then the remaining liquid is called Lactic Acid Bacteria. Collect this liquid separately.
Preparation of fermented rice:

  1. Keep the cooked rice as it is undisturbed for 4 days. It gets fermented.
  2. There will be a layer over the surface of the fermented rice. It is an indication.
Now, Add LAB to the fermented rice. it will turn into a solution. Now! to this solution add some handful of rice bran in the solution. Leave the solution as it is for 4 days.

Now! the bacteria culture is ready.

6.Now add 10 ml to 20 ml of the above solution to the compost pile once in a week and turn it whenever you find time...

That's it! The compost will get ready in a short period of time. This is the easiest and fastest way of composting in a pit!

For further questions, put them in the comments section below!..

Hope this helps!

Summer Care

If you don't want to worry about looking at your garden in a pathetic condition, then you should be knowing how to act early and if you ...